Adhesive foil Instructions
Instructions – Blade settings
Are you completely new to adhesive foils? Then feel free to check out the adhesive foil instructions under the settings for the foils! There, we’ll show you step-by-step how to best work with adhesive films. Jump straight to the instructions here.
Blade settings
Find & Get Started – key features and all settings for your device
Blade settings
| Device | Blade | Contact pressure |
|---|---|---|
| Silhouette | 1 | 10 |
| Brother CM Series | 1 | -4 |
| Brother DX series* | Auto | Auto |
| When using a Cricut cutting machine** | 135 | Less |
Please note that the contact pressure may vary depending on the wear of the blade. must be increased.
* Activate half-cut function
** Multi-cut OFF – Blade type: Fine blade
Note:
To transfer the cut foil onto the target object, you will need a transfer foil.
Since the vinyl foil is applied to a paper backing, you will need a lightly adhesive cutting mat for plotting with your cutting machine
Not food safe.
Blade settings
| Device | Blade | Contact pressure |
|---|---|---|
| Silhouette | 1 | 10 |
| Brother CM Series | 1 | -3 |
| Brother DX series* | Auto | Auto |
| When using a Cricut cutting machine** | 135 | Standard |
Please note that the contact pressure may vary depending on the wear of the blade. must be increased.
* Activate half-cut function
** Multi-cut OFF – Blade type: Fine blade
Note:
To transfer the cut foil onto the target object, you will need a transfer foil.
Since the vinyl foil is applied to a paper backing, you will need a lightly adhesive cutting mat for plotting with your cutting machine
Not food safe.
Blade settings
| Device | Blade | Contact pressure | Passes |
|---|---|---|---|
| Silhouette (two passes) | 5 | 33 | 2 |
| Brother CM Series | 3 | 2 | 1 |
| Brother DX series* | Auto | +2 | Auto |
| When using a Cricut cutting machine** | 250 | Standard | – |
Please note that the contact pressure may vary depending on the wear of the blade. must be increased.
* Activate half-cut function
** Multi-cut OFF – Blade type: Fine blade
Notes
To transfer the cut foils onto the target object, you will need a strong adhesive transfer foil.
Since the vinyl foil is applied to a paper backing, you will need a lightly adhesive cutting mat for plotting with your cutting machine
Blade settings
| Device | Blade | Contact pressure |
|---|---|---|
| Silhouette | 4 | 33 |
| Brother CM Series | 1 | 1 |
| Brother DX series* | Auto | Auto |
| When using a Cricut cutting machine** | 180 | Standard |
Please note that the contact pressure may vary depending on the wear of the blade. must be increased.
* Activate half-cut function
** Multi-cut OFF – Blade type: Fine blade
Blade settings
| Device | Blade | Contact pressure |
|---|---|---|
| Silhouette | 1 | 10 |
| Brother CM Series | 1 | -3 |
| Brother DX series* | Auto | Auto |
| When using a Cricut cutting machine** | 135 | Standard |
Please note that the contact pressure may vary depending on the wear of the blade. must be increased.
* Activate half-cut function
** Multi-cut OFF – Blade type: Fine blade
Note:
To transfer the cut foil onto the target object, you will need a transfer foil.
Since the vinyl foil is applied to a paper backing, you will need a lightly adhesive cutting mat for plotting with your cutting machine
Not food safe.
Blade settings
| Device | Blade | Contact pressure |
|---|---|---|
| Silhouette | 2 | 25 |
| Brother CM Series | 1 | -3 |
| Brother DX series* | Auto | Auto |
| When using a Cricut cutting machine** | 135 | Standard |
Please note that the contact pressure may vary depending on the wear of the blade. must be increased.
* Activate half-cut function
** Multi-cut OFF – Blade type: Fine blade
Note:
To transfer the cut foil onto the target object, you will need a transfer foil.
As the vinyl foil is applied to a paper backing, you will need a lightly adhesive cutting mat for cutting with your cutting machine.
Not food-safe
Blade settings
| Device | Blade | Contact pressure |
|---|---|---|
| Silhouette | 1 | 10 |
| Brother CM Series | 1 | -3 |
| Brother DX series* | Auto | Auto |
| When using a Cricut cutting machine** | 135 | Standard |
Please note that the contact pressure may vary depending on the wear of the blade. must be increased.
* Activate half-cut function
** Multi-cut OFF – Blade type: Fine blade
Note:
To transfer the cut foil onto the target object, you will need a transfer foil.
As the vinyl foil is applied to a paper backing, you will need a lightly adhesive cutting mat for cutting with your cutting machine.
Not food-safe
Instructions
It’s easy with the adhesive foil guide
What can be refined
The applications for adhesive and vinyl films are almost limitless. These versatile materials are perfect for enhancing surfaces such as glass, wood, metal, or plastic – for example, with personalised water bottles, phone cases, or door signs. Adhesive films are also popular in interior design. Walls, furniture, or tiles can be easily decorated and customised with designs, quotes, or patterns.
What you need
- Your adhesive foil
- A suiting transer foil which will work with your adhesive foil
- Your design
- Surface for refining
- A cutting machine for cutting out your designs
- Optional: Tool for easy weeding and processing of the foil
1. As the first step in the adhesive film tutorial, you should create your design using design software (for example, from your cutting plotter). Alternatively, you can use a design from our USB design sticks.
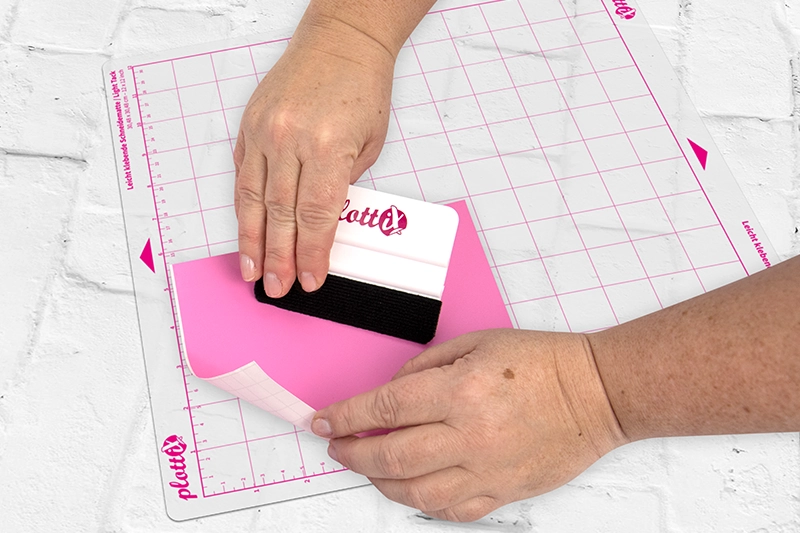
2. Place the adhesive foil with the backing paper facing down into your cutting machine, with the material side facing up. If you are using a cutting mat, make sure it is not too sticky, as this could make it difficult to remove the backing paper without leaving residues.
To apply your foil bubble-free, smooth the adhesive foil with a squeegee. You can then start the cutting process – make sure you use the correct settings for your device.
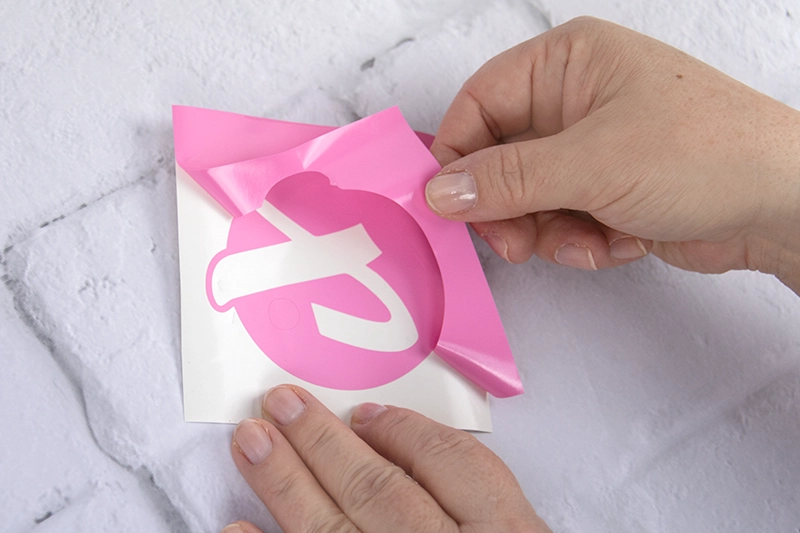
3. Once your design is cut, you can weed it.
Remove all parts not belonging to the motif from the carrier film. What remains is your design.
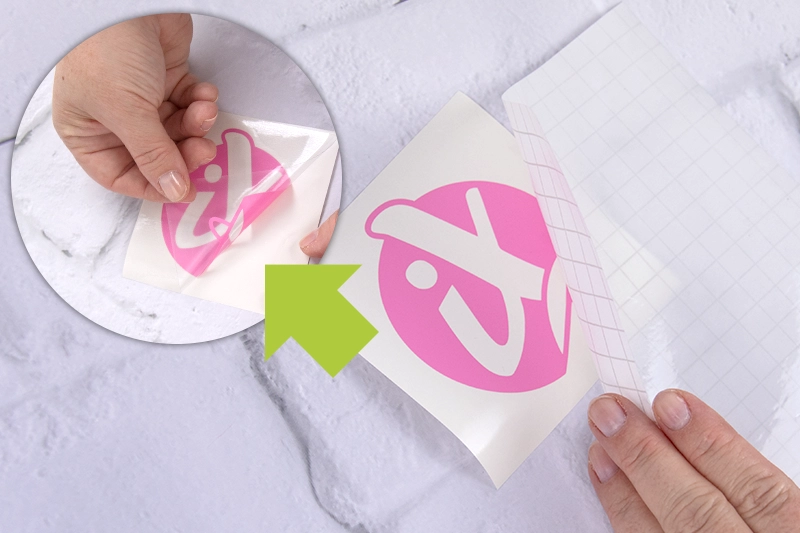
4. Use a transfer foil to apply your adhesive foil.
Cut it to the correct size. Then stick it carefully onto your weeded design.
Use a squeegee to press the transfer foil firmly onto your adhesive foil. You can then remove the adhesive foil from the carrier paper using the transfer foil.
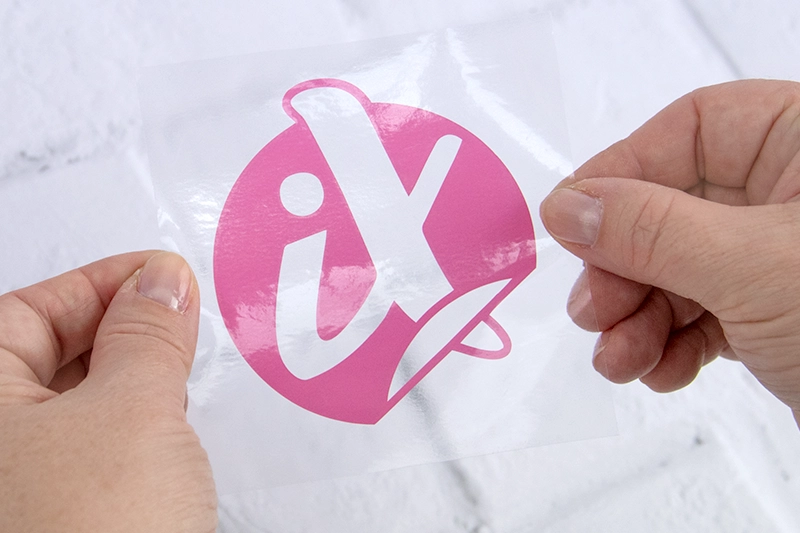
5. You can now transfer your design onto a suitable surface using transfer foil. Make sure that your surface is smooth and clean.
Place your design and transfer foil on your desired surface and squeegee the design thoroughly onto the surface.
6. Finally, you can gently remove the transfer foil. Get creative and use the adhesive foil for various projects!
FAQ
Your Questions – Our Answers on the Adhesive foil Guide!
The plottiX permanent vinyl foil impresses with its strong adhesive strength, making it ideal for durable designs both indoors and outdoors.
Vinyl foil can usually be removed without leaving any residue by peeling it off slowly and carefully. If necessary, a hairdryer can be used to soften the adhesive with heat, making it easier to remove.
Yes, our adhesive and vinyl foils are perfect for cutting with a cutting machine. You can find the appropriate cutting and printing settings in the table above, where we have clearly compiled all the important information for you.
A squeegee can be used to effectively remove air bubbles from your design. Be careful not to damage the design in the process.
For refining textiles, it is recommended to use an iron-on foils, as they ensure a long-lasting adhesion.
We offer vinyl foils in various formats – from handy sheets to large rolls. This way, you will always find the right solution for your diverse projects.